China Top How to Install a Universal Coolant Hose Kit?

Time:2026-09-22 Author:Sienna
0%

Installing a universal coolant hose kit sounds simple, but cooling systems punish rushed decisions. A hose may fit the radiator outlet and still bend sharply near the thermostat housing. That hidden kink can restrict coolant flow within minutes. How to install a universal coolant hose kit requires measurement, patience, and a careful inspection of the entire cooling circuit.

Automotive cooling-system technician Mark Hamilton advises, “A hose is only correctly installed when it remains relaxed, supported, and clear of every moving part.” His guidance reflects practical workshop experience. Begin with a completely cold engine. Record each hose route before removal. Drain coolant into a suitable container, then compare the old hose with the replacement. Measure bends, outside diameter, and connection depth. Do not force a hose onto a mismatched neck. It may seal temporarily. That is not reliable.

Use a sharp, clean cutter for smooth bends. Avoid crushing the hose wall. Position clamps behind the raised sealing bead, not at the hose edge. Check clearance from belts, fans, exhaust parts, and sharp brackets. A few millimeters can disappear as the engine moves. Support long sections with suitable clamps, but avoid over-tightening them. I have learned that a neat-looking installation can still fail after one heat cycle. Recheck everything. Refill with the manufacturer-approved coolant mixture, then bleed trapped air according to the vehicle procedure. Finally, pressure-test the system and inspect for seepage after warming the engine. The process is not perfect. Your first routing choice may need revision. That is safer than ignoring a small warning sign.
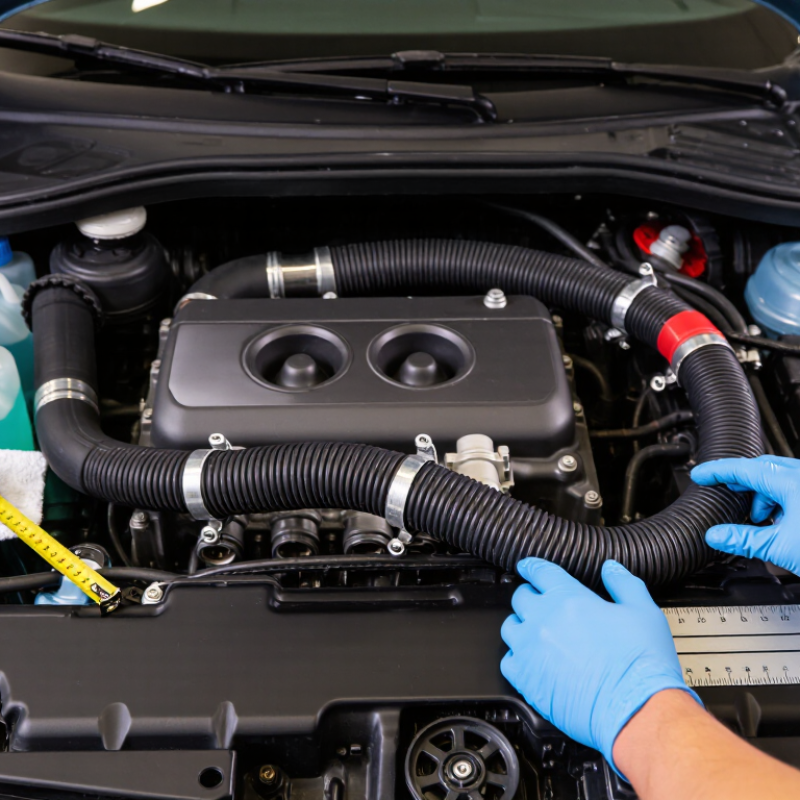
China Top How to Install a Universal Coolant Hose Kit?

Universal Coolant Hose Kit Components, Sizes, and SAE 20R3/20R4 Standards

China Top How to Install a Universal Coolant Hose Kit?

A universal coolant hose kit usually includes radiator hose, heater hose, bypass hose, elbows, reducers, clamps, and sealing plugs. Some kits also include a spring insert to prevent collapse. A universal kit is not truly universal. Measure the inside diameter, outside diameter, bend angle, and usable length before cutting. SAE J20R3 generally covers heater hose, while SAE J20R4 covers radiator hose. These classifications describe performance requirements, not automatic vehicle fitment.

S&P Global Mobility reported that the average United States light vehicle age reached 12.6 years in 2024. Older cooling systems need careful inspection around hose joints, clamps, and plastic fittings. During installation, drain the engine when cool, match each hose to its routing, and keep it away from exhaust heat. Cut with a sharp, square blade. A twisted hose can restrict coolant flow.

SAE 20R3 hose suits many heater-circuit applications, while SAE 20R4 hose is intended for radiator service and higher thermal stress. Confirm coolant compatibility and temperature ratings from the technical sheet. I still recheck every bend after tightening clamps. It is easy to overlook a small kink. The Auto Care Association’s 2024 Factbook valued the U.S. automotive aftermarket at roughly 383 billion dollars in 2023, showing why reliable replacement components matter. Yet, choosing by diameter alone remains a weak installation practice.

Safety Checks: Let the Engine Cool Below 40°C and Relieve System Pressure

Before installing a universal coolant hose kit, make safety your first task. Let the engine cool below 40°C. Use a scan tool or infrared thermometer to confirm the temperature. The dashboard gauge may look normal while trapped coolant remains dangerously hot. Never remove the pressure cap on a warm engine.

I have rushed this step before, and the result was a sharp hiss, spilled coolant, and a damaged glove. Place a thick cloth over the cap. Turn it slowly until the first stop, then wait for pressure to escape. If coolant sprays or bubbles, tighten the cap again and allow more cooling time. Keep the vehicle level, engage the parking brake, and keep children and pets away from the work area.

After pressure is relieved, drain the coolant into a suitable container. Do not pour it onto the ground. Inspect the hose routing, clamps, fittings, and nearby components for heat damage. Measure each replacement section carefully, allowing enough length for smooth bends without kinks. A universal hose may fit several applications, but it still needs proper diameter and secure contact. I sometimes mark the old hose before removal, although photographs are safer when the layout is confusing. Wipe every connection dry before tightening clamps. A small leak can become serious after the system reaches operating pressure. Refill with the correct coolant mixture, bleed air according to the vehicle’s service instructions, and check for leaks only after the engine warms gradually.

Universal Coolant Hose Kit Installation: Safety Temperature Checks

Before removing a hose or opening the cooling system, switch off the engine and wait until the coolant temperature is below 40°C. Release the pressure slowly with protective gloves and a cloth. The typical thermostat operating range is approximately 80–90°C, while 100°C represents the boiling point of water at sea level; actual coolant behavior varies with mixture, pressure, and altitude.

Measure, Cut, and Route Hoses for a Minimum Bend Radius of 3× Diameter

Installing a Universal Coolant Hose Kit

A universal coolant hose kit requires careful measuring before any cutting. Work only on a completely cool engine. Measure each route with the fittings installed and the hose relaxed. The minimum bend radius should be three times the hose’s outside diameter. A 25 mm hose therefore needs at least a 75 mm bend radius. Tighter curves can flatten the hose, restrict coolant flow, or create stress near the fittings. Leave enough length for engine movement, but avoid loose loops touching belts, fans, or sharp brackets.

Tips: Use a flexible wire as a routing template. Mark the hose with a fine pen, then check the path again. Cut with a sharp, square-edged tool. A crooked cut may prevent even clamp pressure. I once measured from the wrong fitting shoulder and lost useful hose length. That small mistake caused unnecessary rework. Check twice.

Route the hose with smooth, gradual curves rather than forced angles. Keep clearance from hot exhaust parts and secure the hose with suitable clamps and supports. Do not place a clamp directly over a bead, wrinkle, or damaged section. After installation, refill the cooling system using the correct procedure and remove trapped air. Start the engine and inspect for leaks as temperature rises. Recheck the routing after a short test cycle, because the hose may settle slightly. A perfect-looking installation can still need adjustment.

Install Clamps at 4–6 mm Behind Bead Edges and Tighten to 3–5 N·m

China Top How to Install a Universal Coolant Hose Kit?

Installing a universal coolant hose kit looks simple, but small positioning errors can create serious leaks. Begin with the engine completely cool. Drain the coolant into a suitable container, then inspect the pipe ends for rust, sharp edges, or old sealant. Measure each hose carefully before cutting. A clean, square cut helps the hose seat evenly.

Push the hose fully over the pipe bead. Do not stop at the bead edge. Position each clamp 4–6 mm behind the bead edge, where the hose has firm support. Keep the clamp square with the hose, not tilted or partly over the bead.

Tighten it to 3–5 N·m using a calibrated torque wrench. Too little torque may allow seepage. Too much can cut into the rubber and weaken it. That mistake is easy to make by feel.

Check every connection twice. Then refill the cooling system with the correct coolant mixture and remove trapped air according to the vehicle service procedure. Start the engine and watch the joints as temperature rises. A dry paper towel can reveal a small leak better than visual inspection alone. I have seen hoses settle slightly after the first heat cycle, so recheck the clamp position when the engine is cool. If the clamp moves or the hose shows swelling, stop and correct it before driving.

Pressure-Test at 1.0–1.5 bar, Refill, Bleed Air, and Inspect for Leaks

Installing a universal coolant hose kit requires careful measurement and clean connections. Let the engine cool completely before opening the cooling system. Remove the old hoses, then compare each replacement against the original route and length. Cut the hose squarely with a sharp blade. Push it fully over the fittings, and position clamps behind the raised fitting edge. Do not overtighten them. Excess force can damage soft hose material.

Pressure-test the sealed system at 1.0–1.5 bar, or follow the vehicle’s specified limit if it is lower. Keep the engine off during this test. Watch the gauge for several minutes. A falling reading suggests a loose clamp, poor seal, or another cooling-system problem. Check around the thermostat housing, radiator connections, and heater hoses with a dry cloth. Small wet marks matter. I once dismissed a tiny seep, and it became obvious after a longer drive.

Tips: Refill slowly with the correct coolant mixture. Use the designated fill point, then open the approved bleed screw if fitted. Run the heater on its hottest setting while the engine warms. Watch for escaping air, falling coolant, and a stable temperature gauge. Never remove a hot cap. After cooling, recheck the level and inspect every joint again. Some systems trap air stubbornly, so one bleeding cycle may not be enough. A final short road test can reveal movement-related leaks, but inspect the system again before regular driving.

FAQS

How cool should the engine be before installing a universal coolant hose?

Let the engine cool below 40°C before opening the cooling system. Confirm this with an infrared thermometer or scan tool. The dashboard gauge may be misleading. Never remove a warm pressure cap.

How can I release pressure safely?

Cover the cap with a thick cloth. Turn it slowly to the first stop. Wait for the pressure to escape. If coolant sprays or bubbles, tighten the cap again. Let it cool longer. Keep children and pets away.

How should I prepare the hose routing?

Photograph the original layout before removal. A flexible wire can copy each route. Measure with fittings installed and the hose relaxed. Leave room for engine movement. Keep hoses away from belts, fans, exhaust parts, and sharp brackets.

What bend radius should the replacement hose have?

Use a minimum bend radius of three times the hose’s outside diameter. For a 25 mm hose, allow at least 75 mm. Tight bends can flatten the hose. Restricted flow may follow. Smooth curves are safer.

How should I cut the hose?

Mark the hose with a fine pen. Check the measurement twice. Use a sharp tool and make a square cut. I once measured from the wrong fitting shoulder. That caused needless rework. Measure again.

Where should the clamps be positioned?

Push the hose fully over the pipe bead. Place each clamp 4–6 mm behind the bead edge. Keep it square with the hose. Do not clamp over wrinkles, damaged rubber, or the bead itself.

How tightly should the clamps be tightened?

Tighten each clamp to 3–5 N·m with a calibrated torque wrench. Too little torque may cause seepage. Too much can damage the hose. Tightening by feel is tempting, but it is unreliable.

How can I check the finished installation?

Refill with the correct coolant mixture. Remove trapped air according to the vehicle’s service instructions. Warm the engine gradually and inspect every joint. A dry paper towel can reveal a small leak. Recheck the routing after the first heat cycle. A neat installation may still need adjustment.

Conclusion

How to install a universal coolant hose kit begins with selecting hoses that match the vehicle’s cooling-system requirements, including suitable diameters, temperature resistance, and SAE 20R3/20R4 specifications. Before starting, switch off the engine and allow the coolant temperature to fall below 40°C. Carefully relieve any remaining system pressure, then remove the old hoses and check the fittings, beads, and surrounding components for damage or contamination.

Measure each replacement hose accurately, allowing smooth routing and a minimum bend radius of three times the hose diameter. Cut the hose cleanly and position clamps 4–6 mm behind the fitting bead edge. Tighten them evenly to approximately 3–5 N·m without crushing the hose. After installation, pressure-test the cooling system at 1.0–1.5 bar, refill it with the correct coolant, and bleed trapped air according to the vehicle’s procedure. Finally, inspect all connections for leaks, confirm stable coolant circulation, and recheck the clamps after the engine reaches normal operating temperature.

Sienna

Sienna

Sienna is a skilled marketing professional with a deep expertise in our company’s core products and services. With a passion for innovation and detail, she plays a pivotal role in crafting insightful blog posts that not only highlight the unique features of our offerings but also provide valuable......