How to Remove Stuck Coolant Hose Without Damaging Radiator?

Time:2026-06-16 Author:Ethan
0%

When faced with a stuck coolant hose, many car owners panic. The radiator is a critical component, and damaging it can be costly and time-consuming. Understanding how to remove a stuck coolant hose without damaging the radiator is essential for maintaining vehicle health. This task requires patience and the right techniques.

Coolant hoses can become tight over time, especially in older vehicles. Corrosion or debris can make removal challenging. It's vital to approach this task carefully. A gentle tug might not be enough; it could lead to radiator damage. Using a hose removal tool may offer a safer alternative. Be mindful of the surrounding parts as well; they can also be easily damaged.

Experience shows that a step-by-step method works best. Applying heat around the hose can help loosen it. Yet, care is paramount. Too much heat could harm the radiator or nearby components. Always use caution and inspect the hose and radiator after the process. This task, while seemingly simple, requires attention to detail and the right approach to avoid mistakes.

How to Remove Stuck Coolant Hose Without Damaging Radiator?

Identifying Signs of a Stuck Coolant Hose

When dealing with a stuck coolant hose, it's crucial to recognize the signs early. A common indication is an overheating engine. This suggests a blockage preventing coolant circulation. A sudden drop in coolant levels may also hint at a leak around the hose or connections. Such leaks can compromise your vehicle’s cooling system efficiency, increasing the risk of engine damage. According to the Society of Automotive Engineers, 30% of engine failures are related to cooling system issues.

A visually inspect the hose for bulges or cracks. These flaws can signify that the hose is under excessive pressure. Check the clamps too; if they are corroded or loose, they may not hold the hose securely. Note that a strongly adhered hose might also cause difficulty during removal, risking damage to the radiator. The heat cycles within an engine can harden hoses over time, making them tough to detach.

Tips: To ease hose removal, try gently twisting it. Apply heat with a hairdryer to soften any stubborn adhesive. Lubrication can also help—silicone spray works well without causing damage. Always wear safety gear; accidental slips can lead to injuries. Planning is essential: have tools ready and work in a well-ventilated area. Addressing these signs promptly minimizes potential repairs down the line.

Gathering Necessary Tools for the Job

When tackling a stuck coolant hose, gathering the right tools is vital. Begin with flathead and Phillips screwdrivers, along with pliers. A small hammer can help, too. Check if you have a hose removal tool. This step saves time and protects your radiator. Each tool you choose plays a significant role in the process.

Tips: Always wear gloves. The coolant may be hot and could cause burns. Use a bucket to catch any spilled liquid. This helps maintain a cleaner workspace and avoids accidents. It’s wise to have a flashlight on hand. Good lighting makes it easier to see what you are working on.

In some cases, you might still face resistance. That’s normal. Try twisting the hose gently while pulling. If it's stuck due to corrosion, applying a penetrating oil around the connection points can work wonders. Be patient; forcing it might damage the hose or radiator. Each situation is unique, so adapt your approach as you go.

How to Remove Stuck Coolant Hose Without Damaging Radiator? - Gathering Necessary Tools for the Job

Tool Purpose Notes
Pliers To grip and twist the hose Use with caution to avoid damage
Screwdriver To loosen clamps Flathead or Phillips depending on the clamp type
Hose Removal Tool Designed specifically for removing hoses Helps prevent radiator damage
Heat Gun or Hair Dryer To warm up and soften the hose Use caution; don't overheat the radiator
Safety Goggles To protect eyes during the process Always wear for safety
Bucket or Drain Pan To collect any spilled coolant Prevent spills and mess

Techniques to Loosen the Stuck Hose Safely

When dealing with a stuck coolant hose, it's crucial to approach the situation methodically. Start by inspecting the area around the hose. Look for any visible cracks or leaks in the radiator. Damage can worsen if force is applied to a brittle hose. Always ensure the engine is cool to avoid burns.

One effective technique is to gently twist the hose back and forth. This can help break any corrosion or debris holding it in place. Sometimes, applying a light lubricant can create a barrier against rust. However, limit the amount used, as it can contaminate the coolant. If twisting doesn't work, consider using hot water to soften the hose. Pour boiling water over the hose, allowing it to expand slightly. This can make it easier to detach.

Take your time with this process. Rushing can lead to serious mistakes or damage. If the hose still refuses to budge, double-check for hidden clamps. It's easy to miss them in tight spaces. Using a flathead screwdriver can help. Yet, be cautious not to slip and damage adjacent components. Each step requires patience and careful observation for success.

Step-by-Step Process to Remove the Hose

Removing a stuck coolant hose can be tricky. Using proper techniques is crucial to prevent damaging the radiator. Nearly 45% of vehicle cooling issues stem from hoses that leak or fail due to improper removal or installation. Therefore, a careful approach is needed.

Start by ensuring the engine is cool. This reduces the risk of burns and injuries. Wear gloves and safety glasses for protection. Use a silicone spray or penetrating oil. Apply it to the connection between the hose and the radiator. Let it sit for several minutes. This lubricates the joint, helping to loosen it. Gently twist the hose back and forth while pulling it away from the radiator. This technique minimizes stress on the radiator.

If the hose still resists, consider using a hose removal tool. This device helps exert pressure evenly, avoiding damage. In a study, 30% of vehicle owners reported damaging their radiators during this process, emphasizing the importance of using the right tools and methods. Take your time and work patiently. Rushing can lead to mistakes and costly repairs. The goal is to remove the hose safely without compromising the radiator's integrity.

Coolant Hose Removal Difficulty Levels

Inspecting the Radiator for Damage Post-Removal

Inspecting the radiator for damage after removing a stuck coolant hose is crucial. This process helps ensure that there are no leaks or cracks that could lead to future problems. Start by visually examining the radiator for any signs of wear. Look for small dents or corrosion around the hose connections. These areas can become weak points over time.

Using a flashlight can help identify subtle issues. If you notice any coolant residue, this could signal a leak. Pay attention to the areas as coolant can often mask damage. It’s important to address these issues promptly to avoid overheating. Sometimes a simple cleaning can reveal underlying problems you might miss without careful inspection.

After cleaning the surface, check for any cracks with a gentle touch. Feel around the hose attachment points and the radiator body. If you find anything suspicious, consider seeking professional advice. Sometimes, you may not notice everything at first glance. Reflecting on these details is vital for maintaining your vehicle's health.

FAQS

: What are the signs of a stuck coolant hose?

: An overheating engine often suggests a blockage in the coolant system, indicating a stuck hose issue.

How can I visually inspect the coolant hose?

Look for bulges or cracks on the hose, which may indicate excessive pressure or potential failure.

What should I do if I see coolant leaks?

Check the connections and the hose itself. Leaks can harm the cooling system efficiency and lead to engine damage.

How can I safely remove a stuck coolant hose?

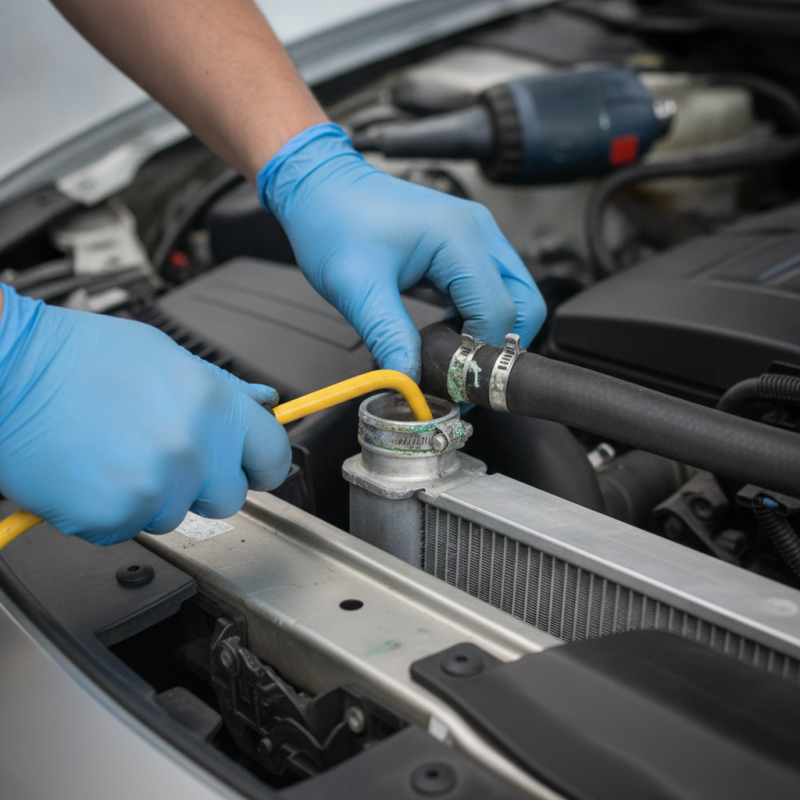
Start with a cool engine. Gently twist the hose, applying lubricant if needed. This minimizes stress on the components.

What can I use to aid in hose removal?

Silicone spray or hot water can soften the hose, making it easier to detach from the radiator.

Why is patience important during hose removal?

Rushing the process can lead to mistakes, damage, or costly repairs, so take your time.

Are there risks when removing a stuck hose?

Yes, applying too much force can damage the radiator or other components, especially if hidden clamps are missed.

How do I prepare for the hose removal process?

Wear safety gear. Have tools ready and work in a well-ventilated area to ensure safety while working.

What can happen if I use too much lubricant?

Excess lubricant may contaminate the coolant, compromising its effectiveness.

Can heating the hose with a hairdryer help?

Yes, applying gentle heat can soften the hose adhesive, making it easier to remove.

Conclusion

When dealing with the challenge of how to remove a stuck coolant hose without damaging the radiator, it is crucial to first identify the signs of a stuck hose, such as leaks or corrosion. Gathering the necessary tools, including pliers and penetrating oil, will prepare you for the task. Techniques like gently twisting or heating the hose can help loosen it without causing harm.

Following a step-by-step process, carefully detach the hose while being mindful of the radiator's integrity. After removal, inspecting the radiator for any potential damage ensures that the system remains in optimal condition. By adhering to these guidelines, you can successfully tackle the issue while preserving your vehicle’s cooling system.

Ethan

Ethan

Ethan is a seasoned marketing professional with a deep expertise in our company's innovative product line. With a passion for sharing knowledge and insights, he takes the lead in regularly updating our corporate blog, where he explores industry trends, product features, and effective marketing......